


Nairnshire photographer shares 10 tips to capture Northern Lights on your mobile phone
Register for free to read more of the latest local news. It's easy and will only take a moment.


With long dark nights and a higher geomagnetic activity, winter nights are perfect to capture the beauty of the Northern Lights.
Nairnshire-based photographer and painter Liz Peck is one passionate "Aurora hunter" and gets out at any opportunity to capture the stunning natural phenomenon.
She shared with us her top tips to capture the lights wherever you are – you only need your phone!
1. No need for expensive cameras
If it's the lack of expensive equipment that is stopping you from capturing the aurora on a good night – don't worry! You can photograph the Northern Lights with your mobile phone – no fancy gear required.
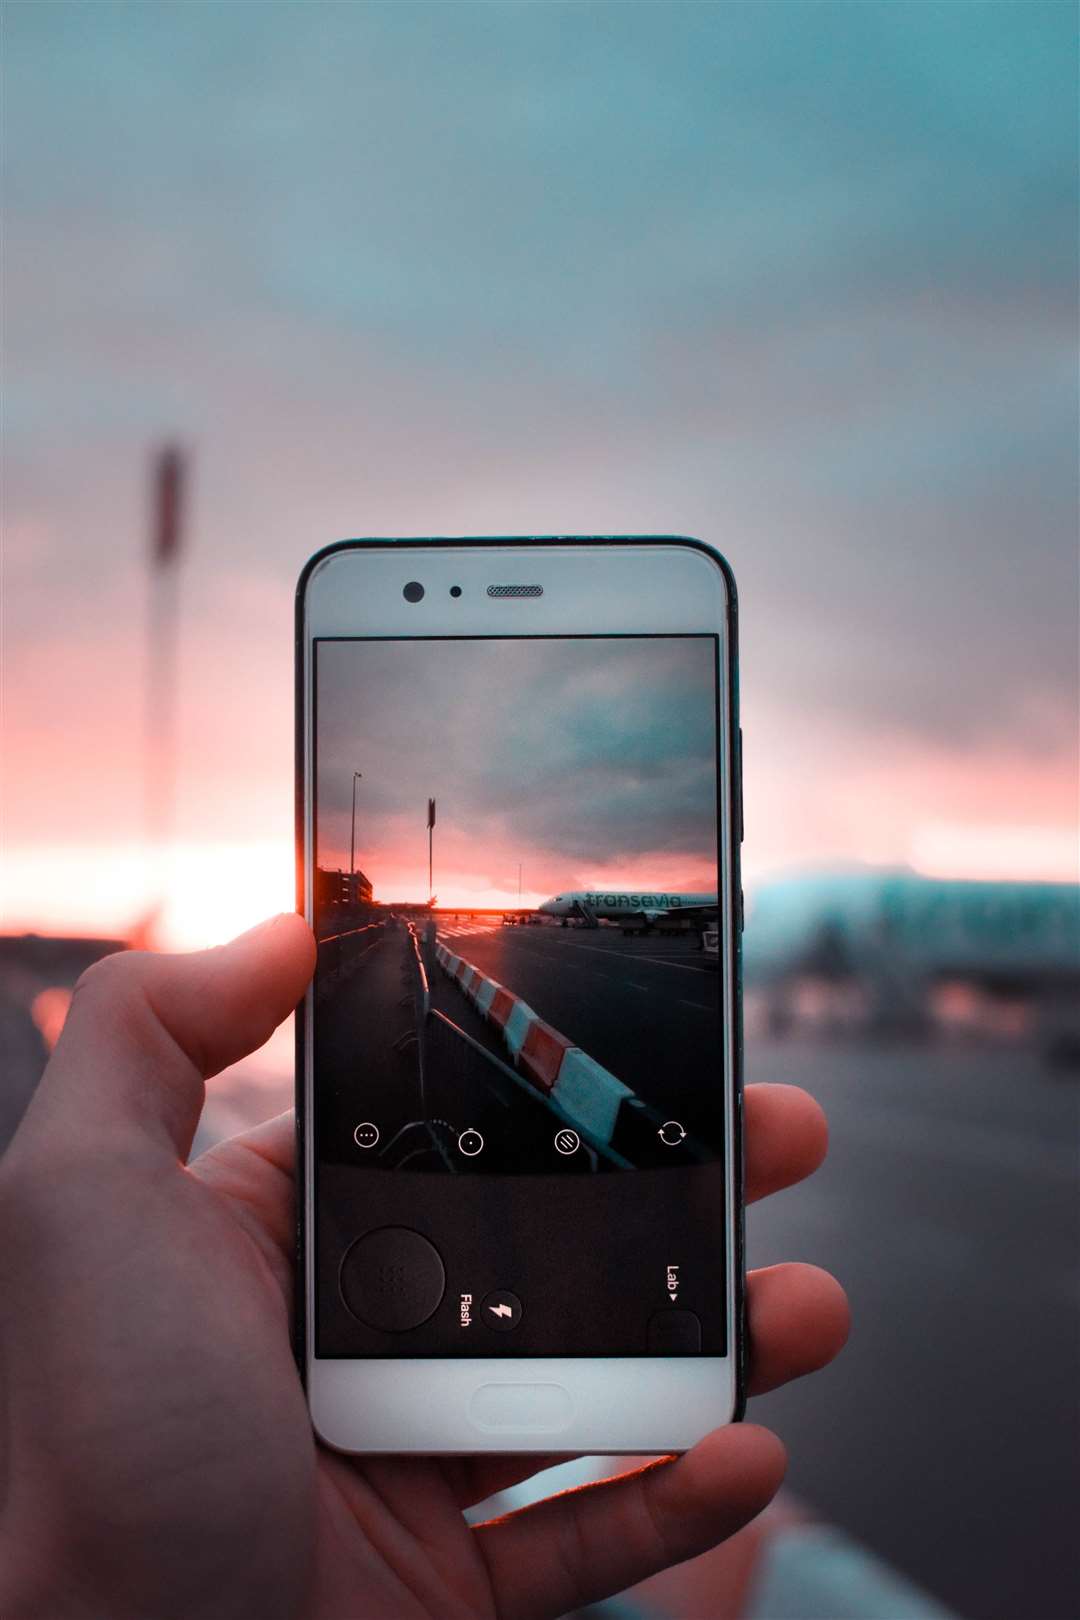
I use a Huawei P30 pro and, almost exclusively, I select night mode. The camera is clever enough to handle everything else for me! I rest it on a fence post, wait a few seconds for it to focus on the stars, hold my breath and click!
To be honest it is hard to tell the difference between my mobile phone pics and those taken with my Canon 5D.
2. Not all mobile phones will do the trick
Well, there is good news...and bad news. The bad news is that not all mobile phones will be able to capture the aurora, but the good news is that most of them will.
At very least, you need a mobile phone with either night or low-light settings. If your mobile also has pro settings then your pictures will rock.
3. The right setting
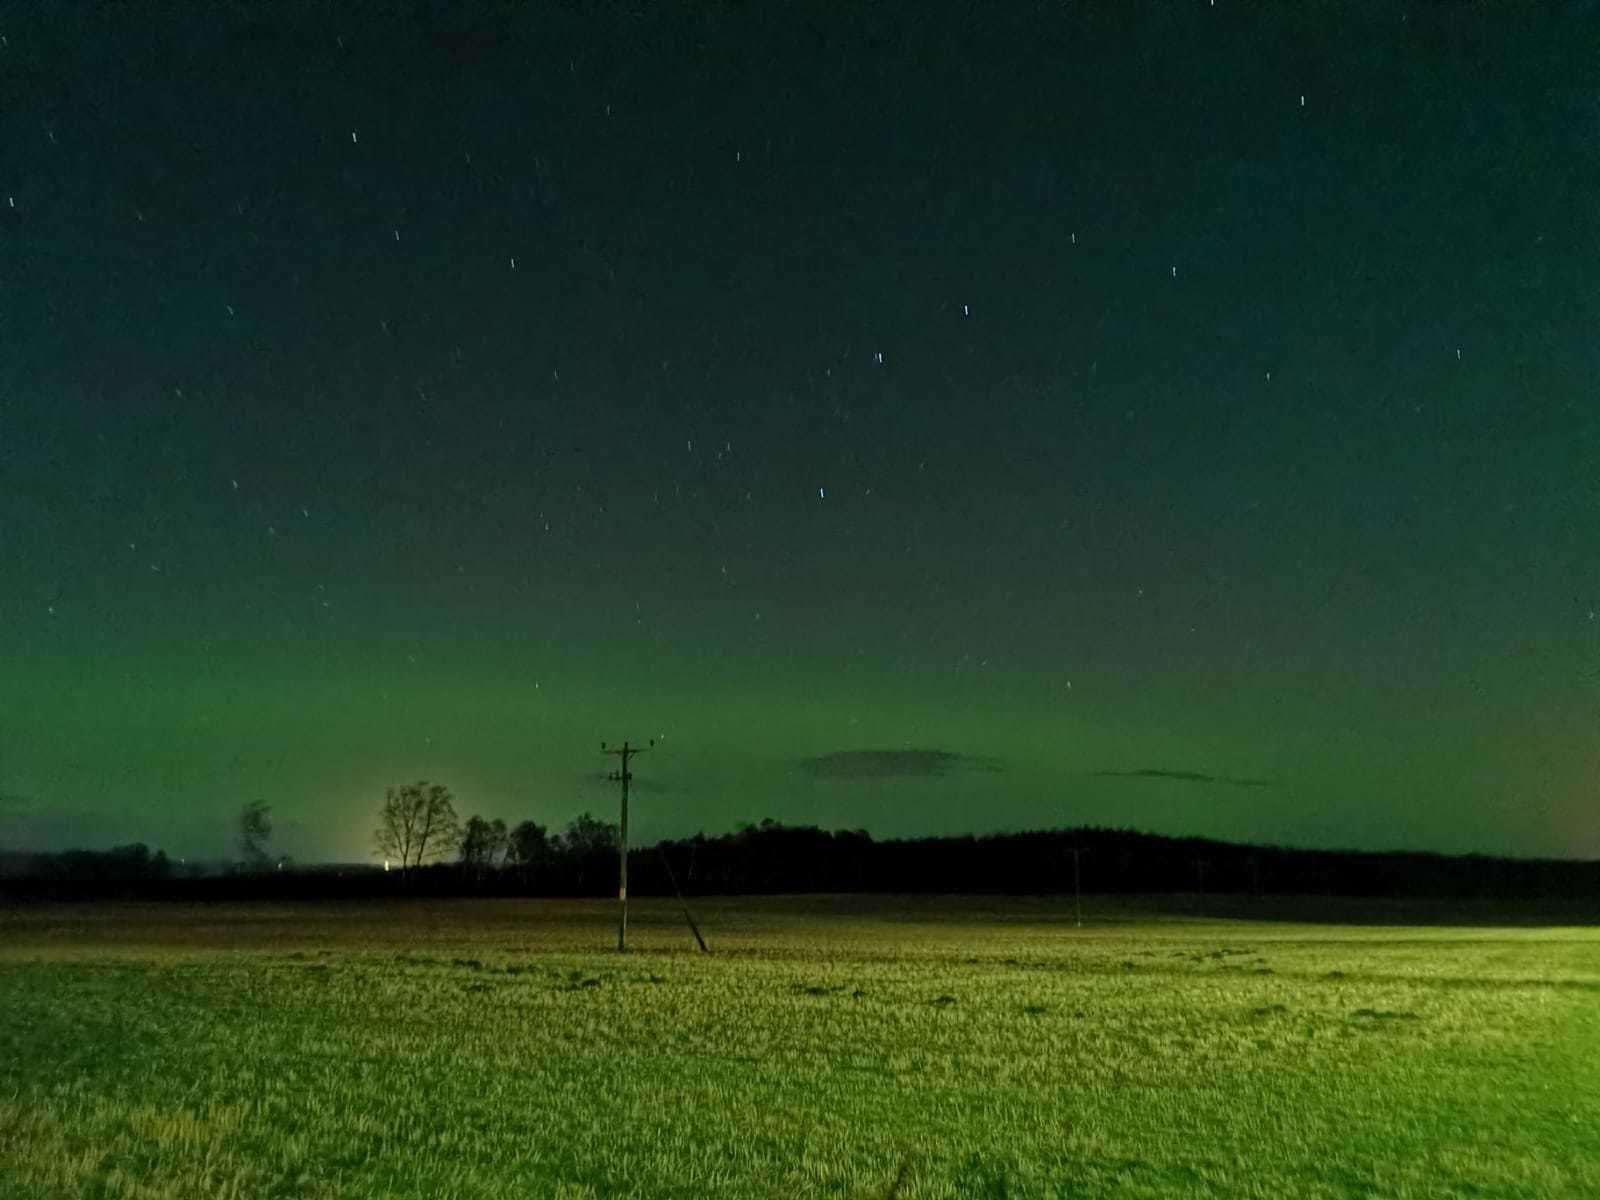
As with all night photography, let your eyes adjust to the dark. As they do, you will see more and more stars and may even start to see the shape and movement of the aurora.
Put your phone into night mode and find something to rest it on to stop it moving.
4. Get creative if you don't have a tripod
There is no need to have a fancy tripod with you.
I use a fence post, my car bonnet or wing mirror to help hold my phone steady. Night photography involves much longer exposures than daytime pictures, so it’s really important to hold your camera perfectly still.
Your pictures will be blurred otherwise. Of course if you want to go the whole hog, then a mobile phone adapter for a tripod will take your photography to a different level – but it’s not essential.
When I’m not in a hurry, I use a nifty device called Gorillapod. It’s a minature tripod with bendy legs that can wrap around tree branches, gates, fences, anything really.
5. Point the camera in the right direction
Make sure you are facing north. It sounds obvious, but so many people show me their photos and ask why they have not captured anything when everyone else caught a great show.
Unfortunately they have been facing entirely the wrong direction! You need a clear view to the north.
Look for the Plough (Ursa Major) in the sky and point your phone in that direction.
Wait for a couple of seconds while your phone tries to find the best focus. Now press the shutter button, holding dead still while the picture is being taken. That’s it!
6. Self timer saves the blur
It’s all down to practice but the self timer on your phone’s camera is your best friend. Set the timer to two seconds, steady your phone and let it focus, press the shutter button, steady again and wait.
Don’t forget to breathe once the picture is taken!
7. Capture like a pro
If your mobile comes with a pro camera mode, you move into another dimension and a very basic understanding of camera settings will be really useful.
You will need to locate your shutter speed, aperture and ISO. Everything else can look after itself.
8. Get to know some of the basics
Aperture (or f number) controls the amount of light getting to your camera’s sensor (same applies whether you are using a mobile phone or grown up camera). For any night time photography we need as much light as possible to reach the sensor so set the aperture as large as it will go. Oddly that means selecting the smallest number in your aperture settings. F2.8 is ideal – but your camera may only let you select f4 or f5.6.
ISO controls the sensitivity of your sensor (those of us old enough to have used 35mm film cameras will know this as ASA) and, amazingly, mobile phone sensors tend to be more sensitive than those on DSLR cameras so select 1600 ISO as your starting point.
Shutter speed does what is says on the tin. In aurora photography we aim for as fast a shutter speed as possible to make sure any movement of the lights stays sharp.
Imagine a racing car flying past you. If you use a short shutter speed your pics will record a pin sharp car. If you use a long shutter speed the car will record as a blur. Very creative but no good for aurora photography! Use 15 seconds as your start point.
- Aperture f2.8/f4/f5.6 depending on your phone
- ISO 1600/3200 depending on your phone
- Shutter speed 15 seconds
9. My photos are too dark/too light
Welcome to the, sometimes frustrating, world of photography! It’s a steep learning curve.
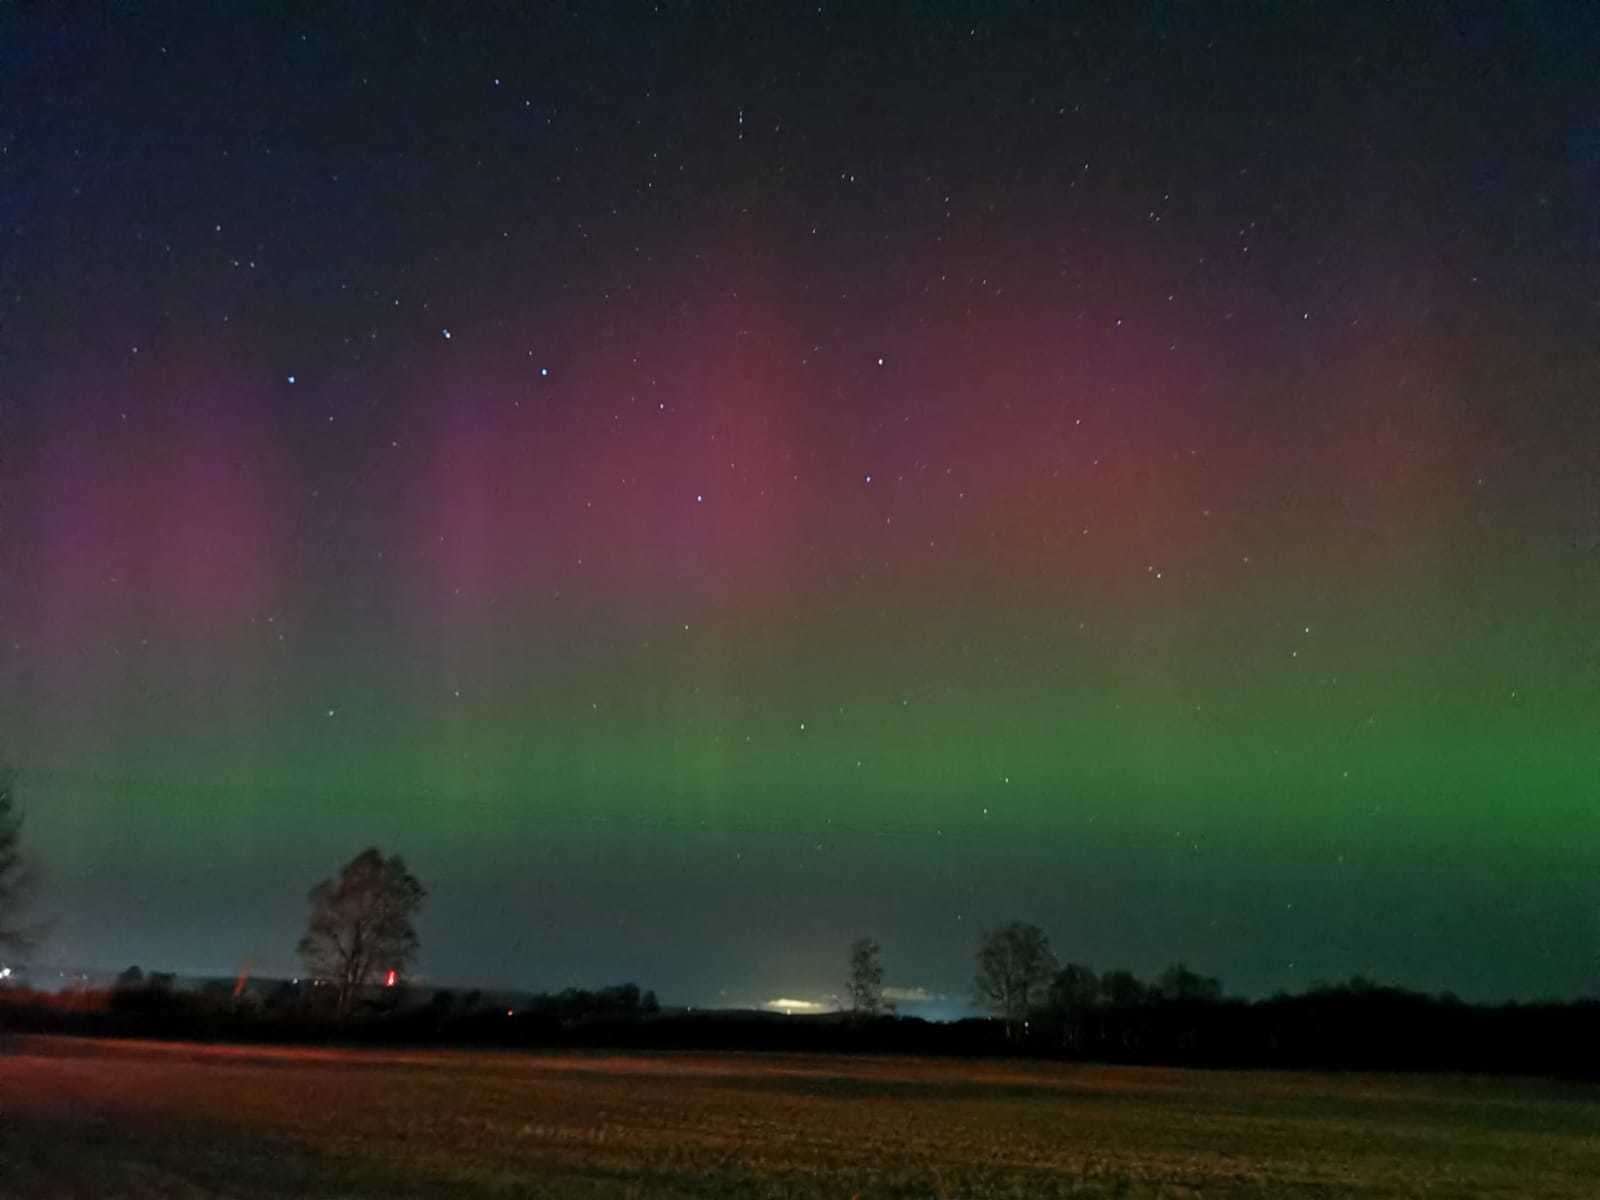
The above figures are just a starting point. You will need to adjust them according to the light levels (sometimes the aurora is so bright the sky looks like dawn) and the capability of your mobile phone camera.
If your photos are too dark, increase your shutter speed and/or ISO. Try one then the other. You may need to do both. The aperture remains constant. Don’t touch it once it is set!
If your photos are too light, decrease your shutter speed and/or ISO as above. Remember to leave the aperture alone!
You have to play with shutter speed and ISO until you find a decent exposure. That’s just the way it is once you enter the world of pro mode!
10. Take a shot, no matter what you (don't) see
Whether you use a mobile phone or a DSLR camera there are a couple of things to remember.
First, if it is cloudy and you cannot see any stars, you won't see the aurora either.
Finally, here in the UK (even in the north of Scotland) it is rare to see the colours of the aurora with the naked eye. You will be amazed at the colours your mobile phone camera picks up. So even if you cannot see anything by eye, take a picture!